Pages

Saturday, February 28, 2015

1930's Skirt - (HSM #2)

The 1930's have never been my forte, fashion-wise. While I've admired that period of history for other reasons, I'd always been under the impression that the long, slim lines would look silly on me.


But when I saw this new pattern on sale at Joann's for $1, I couldn't pass it up. At the very least, I could give the fashions a real chance before making up my mind.


Since the prompt for this month was 'blue,' I pulled out a length of plaid fabric from my stash and started sewing up option B, without the belt. The pattern itself was really straightforward and easy to put together. There are seven gores; one of which I cut on the bias.

I ran in to two problems during the construction:

1. The fabric was too stretchy. It's not really a stretchy fabric in and of itself, but when the pieces were put together, it was too big and just slipped right off my waist. I'd cut my regular size but had to take 8 inches out of the waist.


2. Pockets. Enough said.

I don't know why I thought pockets would be a good thing to add to the skirt, but I did. And, boy, was it ever a bad idea.


As flat as I could get the pockets to lay.
In the picture above, the skirt is finished except for hemming. I tried it on only to find that the pockets gaped, pulled, wrinkled, and looked just plain awful. So I quickly cut them out and sewed the slits closed.


Today was tank-top weather!
 The skirt lays infinitely better with the pockets taken out. I slipped my Oxford heels on this morning to take a few pictures of the finished product and was entirely pleased with how it turned out. I hadn't expected the skirt to flatter me, but I find that my opinion of 30's fashions has changed dramatically!


I like how the front gore looks cut on the bias, but I could have done a better job matching the stripes through the rest of the skirt. The seams around the back don't look too bad, but, looking at it again, I think I should have matched the patterns.

Well, there's always next time.


The Challenge: Blue (HSM #2)
Fabric: Blue/black plaid (with a very subtle pink stripe running through)
Pattern: McCall's M6993
Year: c. 1933, as it says on the pattern.
Notions: Navy thread and zipper. Black hook-and-bar. 
How historically accurate is it? I can't really say. I know that plaid was popular during the 30's, as was cutting on the bias. But, I know the fabric content isn't accurate and I don't know about how I sewed. I would guess somewhere around 60-70%?
Hours to complete: Probably about 5-6. I would have saved myself a lot of extra time if I hadn't wasted time with those stupid pockets.
First worn: Today to take some pictures. I'm planning on actually wearing it on Monday, though.
Total cost: I bought the fabric so long ago, I don't remember its cost. I tend to buy fabric that is around $3/yard and I used about 2 yards. So my guess would be about $6. I had the notions already and I'd bought them at such a low price that they wouldn't even add another dollar onto the total.

Thursday, February 12, 2015

Shoes + Springtime


Punxsutawney Phil may have predicted six more weeks of winter, but as far as I am concerned spring has already arrived in the Pacific Northwest. The highs have almost reached 60 and we are looking forward to a week of sun. Today was overcast, but still nice enough to not need a jacket when I went out this afternoon.

In fact, it's been so nice lately that I finally pulled out my box of spring- & summertime clothes and packed away my winter jackets, sweaters, and scarves. It was nice to get some space back in my closet.


And I was happy to see all of my sandals again. Shoes are one of my greatest loves and I'm always excited to rotate through them as the seasons change.


With as warm as it is, I was happy to see little buds and flowers poking their heads out when I took the puppy out on a walk today. I brought my camera along and was able to get her to hold still long enough that I could snap some shots.


All in all, it made for a lovely day.


And how could I not include a picture of the puppy 'helping' with the photoshoot? She loves that darn window-seat and having shoes in it was even more exciting than usual!

Friday, February 6, 2015

1730's Chemise - (HSM #1)

When I saw that the first HSM challenge was 'foundations', I decided that I wanted to use it to make my first foray into the 18th century sewing. Since I started, I've done projects that spanned from medieval to renaissance and then Victorian to modern-day, but nothing in between.


The Spring, by Jean Marc Nattier, 1738 © The Metropolitan Museum of Art
I spent a lot of time doing research because I started with zero knowledge about this era; just a few general ideas about shape and necessary pieces. It took a while, but I decided on the 1730's and based my shift's construction off of the research done by Sharon Ann Burnston and used the painting The Spring (above) as a visual guide.


With all the time I spent doing research, I started really late in the month and had only a couple days to sew it. I swung by Joann's one afternoon before I had to go to work and bought two yards of 90 inch muslin with a 50% off coupon.


The next night I took all my measurements (on the piece of paper at the top of the photo) and laid out the muslin to cut it up. The fabric was folded four layers thick so the front piece wouldn't have to be sewn to the back piece at the shoulders and, as it so happened, 45" was right where I wanted the bottom of my chemise to be so it fit quite perfectly onto the muslin.


I spent the night watching the stage production of Oklahoma! and sewing it all together by hand with cotton thread. I tried to get it all done that night, but, by 4:30 am, I just couldn't do it any more.


It was going well until I got to the sleeves. I had originally planned to just gather them into cuffs that were loose enough so they didn't need an opening, but, looking back at my guide picture and re-reading the instructions, I realized that they actually had a small slit up towards the elbow and closed with a ribbon (or cuff-links) through buttonholes. At first I was going to just move past it, but I couldn't bring myself to and had to go back and re-open part of the sleeves that I'd previously sewn shut.

So it followed me around in a basket for the next couple days as I hemmed the new openings and gathered them in to cuffs. I was a little nervous to do buttonholes for the second time ever, but it turned out alright. At this point I had to face it that I would finish a couple days late but I didn't want to over-do it on the first entry of the year.

So, in the end I finished two days late but I'm glad that I finished it at all. I had a love-hate relationship with all of the hand-sewing along the way but I'm pretty happy with the final product. If I could do it over, I would have made the sleeves a little fuller, but I think it's pretty good.


Final Product:


Front.

Sleeve detail.

Side detail.

Side.


The Challenge: Foundations (HSM #1)
Fabric: White Muslin
Pattern: Made from my measurements using the instructions here.
Year: 1730's
Notions: White cotton thread, pink ribbon
How historically accurate is it? Pretty accurate, I would say. I stuck to historically-accurate methods of sewing and the shape, cut, etc. are right. It's made of cotton, not linen, but there is evidence of cotton chemises from that time.
Hours to complete: I would estimate 10-15. I need to get faster at sewing by hand...or quit getting distracted by mid-century musicals.
First worn: I haven't worn it yet. I did try it on once before I added the sleeves to check the neckline, but that was it.
Total cost: Somewhere around $5 because I ended up having a little less than half of the fabric left over. Everything else was taken from my stash.

Thursday, January 15, 2015

The Renaissance Project - Caterina

My initial plan of attack for making multiple costumes was to make each person's full outfit at a time. Start from the base and work out, finishing it before moving on to the next one. Since I'd never made anything from this era before, I would be able to work out the kinks as I went along and, hopefully, be able to do each set quicker the next time around. Plus, I could check off whole outfits at a time and get (what felt like) a lot off my plate.

First up was my sister's outfit, the Caterina dress.

Design


Portrait of a Lady by Sebastiano Mainardi, late 15th century. © The Norton Simon Foundation www.nortonsimon.org.


I wanted to make something like the dress in the portrait by Mainardi. I liked the squared neckline and the evidence of side lacing (which my sister had specifically requested instead of front lacing), but I would have to do something about the spots where the camicia showed. 

My sister already had a medieval shift that I'd made for her about three months before, so (to save money) we both decided just to use that. It had a nice, wide neckline and long sleeves, but it was basically just an a-line garment without any extra fabric gathered in the style of a renaissance camicia. So that meant that it wasn't large enough to pull through any slashes or lacing.

Profile Portrait of a Woman by Piero del Pollaiolo, 14 © Isabella Stewart Gardner Museum www.gardnermuseum.org.
The next image I looked to was this one. The camicia looked much more like the one that we were working with and there weren't any slashes or gaping seams on the dress (except for the lacing) that would show it. I really liked the trim around the neckline and it's one feature that I carried through to my final design.

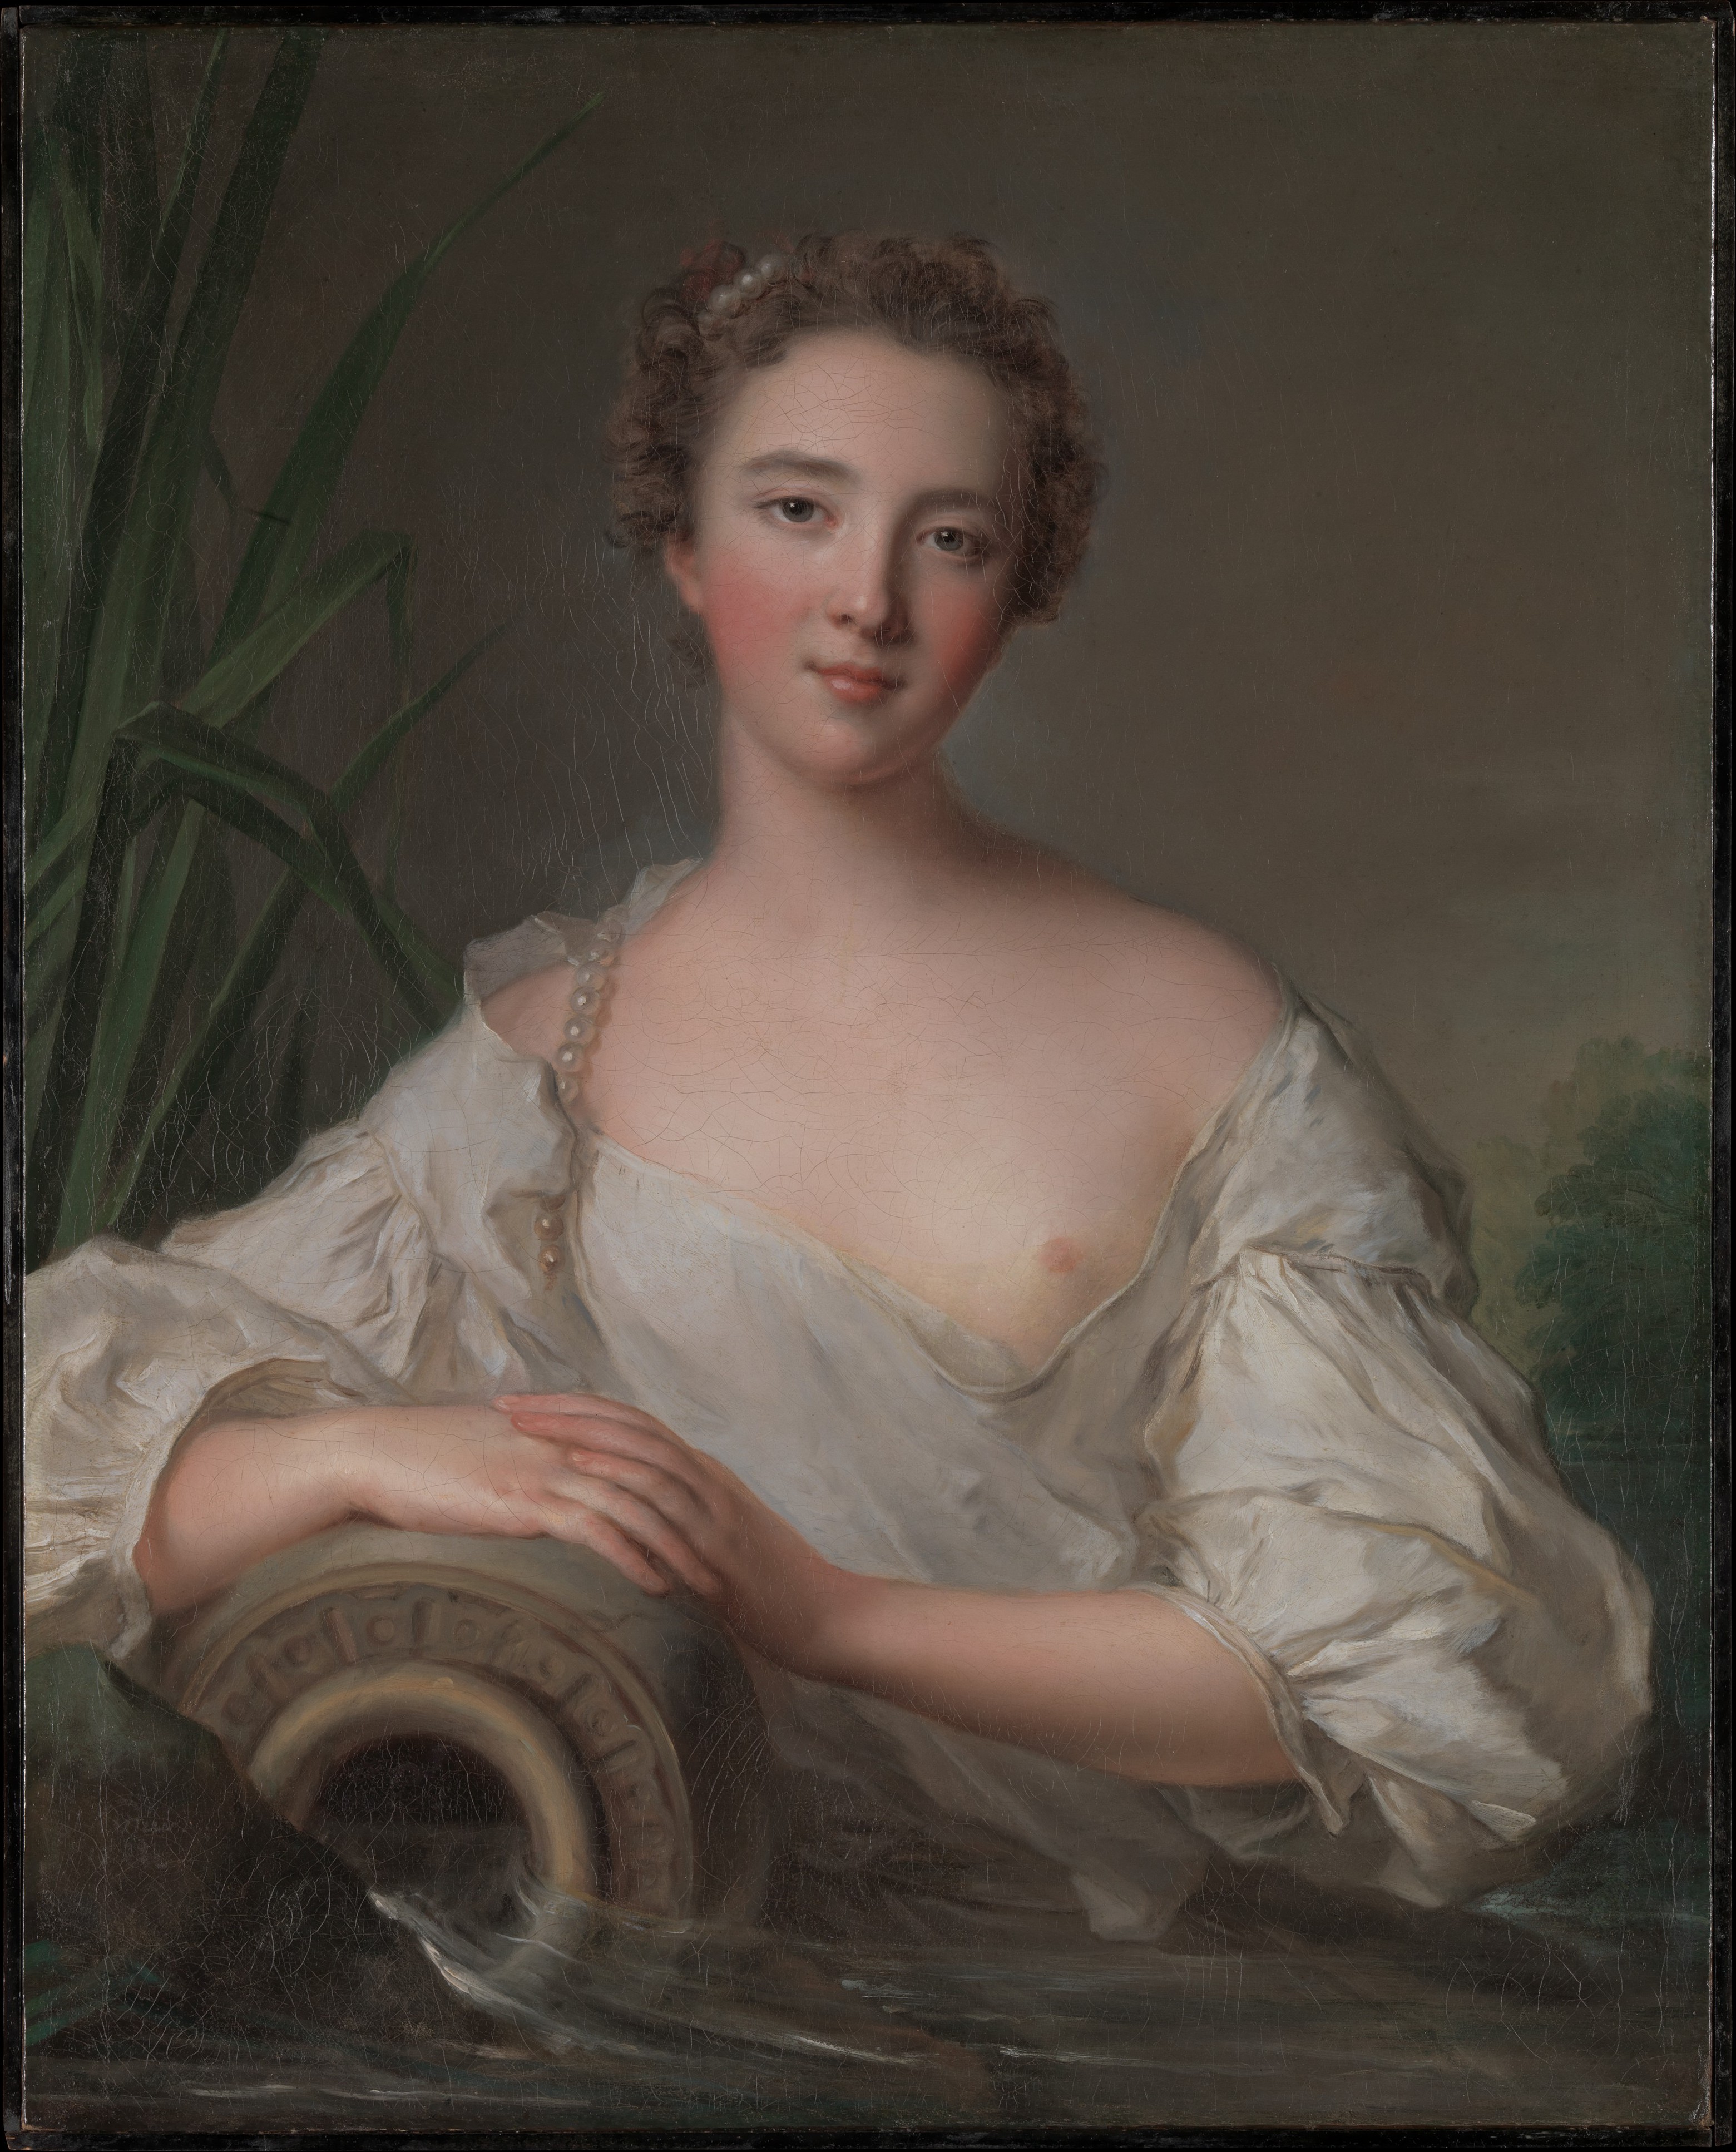
Portrait of Maddalena Doni by Raphael, 1506.

After thinking about it for a while, I decided that this would be the best direction to go with the sleeves. It would add width to the arms without having to rely on bulk from the sleeves. The only part where the sleeves were puffed through was at the shoulder, which I thought we might be able to pull off. Doing this tipped the date of her dress forward a few years, but that was okay by us.

One item that was important to make was a pocket. I made it in less than an hour, based on some of the wonderful research done here. The pockets dated from about half a century later, but it was a necessary addition to the outfit so my sister could have her insulin pump on her. I sewed a ribbon on the top so she could tie it around her waist.

My sketches. 

When I had an idea of where to start, we headed to the fabric store. We picked up about three yards of a thin, flowy, black fabric (that I've since forgotten the name of) and half a yard of a pre-gathered, burgundy 'novelty taffeta' for her sleeves. We got a yard of trim for the neckline, a package of leather strips (for lacing), and some square toggles from the jewelry section to use as lacing rings. We had all the materials and were ready to begin.

Fabric for the sleeves. So pretty! And only $2.

Construction
a.k.a. Thank goodness for time-stamps

October 10, 7:54 PM:

My sister puts on her shift and cooperates while I pin on some square cuts of cotton so I can make a pattern for her bodice. It goes fast (in my opinion) and I have a pattern ready soon thereafter. It's square-necked, ends just above her natural waist, and is left open on one side under her arm.

She got bored fast.
 October 10, 8:59 PM:

The bodice pattern is trimmed down to be even all around and I cut it out of the black fabric we bought earlier that day. I use the cotton to flat line it and sew all around the edges, joining the layers together. I sew the front to the back at the shoulder seams and one of the side seams.


I spend the rest of the night overcasting the seams and finishing the edges.

October 11, 10:40 AM:

I cut out four pieces of zip ties to use for some light boning in the bodice. I panic a little because I'd never ever done this before. I take a deep breath and just go for it. I sew them into little casings so I can attach them onto the bodice at the side seams.


Sewing the zip ties into separate channels. You can see Barbara (my dress form) to my left.

I sew them onto the bodice, four in all. Then I worry because they're starting to poke through the flimsy cotton I used so I go over them again with a needle and thread. In the end, I pull out some ribbon and use it to cover two of the four channels. It'll hold.


Covered with a ribbon on the right, exposed(ish) on the left.

11:47 AM:

I sew on the lacing rings. The opening is only about four inches long, so I only need six out of the package of 17 that I bought. This doesn't take long.


The puppy even decided to cooperate and take a nap.


The lacing rings on one side. There's one more at the bottom there that you can barely see in the picture.


1:57 PM:

My sister comes home and I rush to have her try on the bodice which now laces up!


I was so pleased how it was turning out!

The lacing held it tight enough to be supportive and the light zip-tie boning prevented the sides from wrinkling or riding up, just as I'd hoped.

3:46 PM:

I pull out the rest of the black fabric to make the skirt. I cut off the little bit of rough edges from where I cut out the bodice and see that I have a lot left. Almost the whole three yards. I decide on cartridge pleating, which I'd never done but always wanted to try. I try to do some calculations but give up halfway through and just go ahead with it.

This took for.ev.er.

I lay it all out and mark the halfway point. I fold down the top about 8 inches (to meet the height of her legs) so I don't have to cut anything off. It'll add extra bulk to the pleats since the fabric is pretty thin and I won't have to hem anything. I place a pin every inch and sew two rows of cartridge pleats every half-inch.

5:57 PM:

I gather it all together and pin onto the bodice. I don't sew up the side seam (yet) so the dress hangs completely open on one side, save for the shoulder strap.

The creepy face in the microwave is just a reflection of the TV. No need to get worried like I did.

My brother comes home and graciously models the dress, careful to not get stuck by any of the pins.

7:54 PM:

I finish sewing the skirt onto the bodice, slip it onto Barbara (my duct-tape dress-form) and settle in to sew the trim around the neckline while watching Survivor.


9:41 PM:

I finish sewing on the trim and get really excited and make my sister try it on.


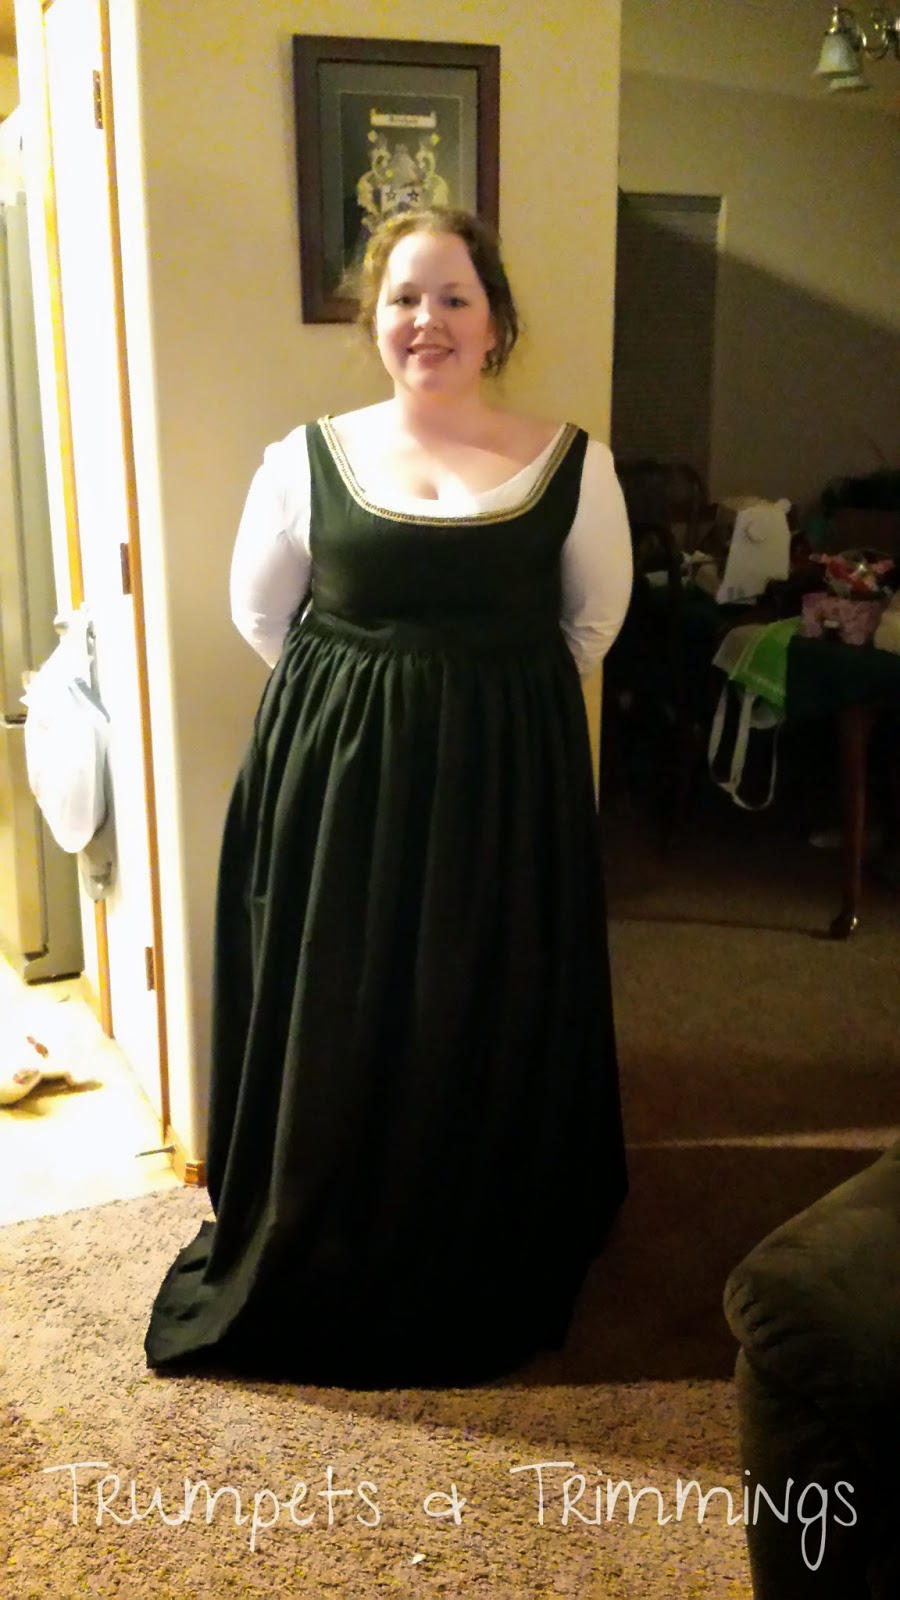
She asked for it to be left long so she could wear heels with it.

It fits wonderfully. I go to bed quite pleased.

October 12, 3:48 PM:

I spend the better part of the day procrastinating by playing Super Mario World and beat it on my own for the first time ever.

And with Luigi, too!
11:40 PM:

I get to work and sew up the sleeves: basically just two tubes of fabric gathered at the wrist and with two ties at the top. I make up a quick pocket (that I forgot to take pictures of, but it's really nothing special at all) out of the leftover black fabric.

I sew up the side of the dress until about four inches from the bottom of the bodice so she can still get it over her head.


This shot reminds me a little of a da Vinci painting - plenty of chiaroscuro.

And we're done!

Final Numbers

Year: c. 1500

Pattern: self-drafted

Materials: 3 yards of black fabric, .5 yard taffeta, 1 yard of trim, scraps of cotton, lacing rings, leather cord, zip ties, small pieces of ribbon, and polyester thread.

Hours: I finished it all, from start to finish, within 52 hours. Counting just the time I was working on it, probably about 12 to 15 hours.

Cost: about $15-20. Lots of sales at Joann and plenty of coupons.


And I'll leave you with a sneak peek of how she wore it on Halloween.

Part Zero: Master Post
Part Three: Lucrezia (my outfit)
Part Four: Vannozza (my mom's outfit)
Part Five: Lorenzo (my brother's outfit)
Part Six: Wearing It All (Halloween 2014)

Wednesday, January 14, 2015

The Renaissance Project - Background and Research

The Renaissance Project
Background, Research, and Planning

Background

When planning out the costumes, the first thing I looked to was original sources. I scoured through paintings from the 15th century and found a lot of inspiration. I'd had a Renaissance board on my Pinterest page for a while, but I pinned more specific images to a new board specifically for Halloween costume ideas (you can also see that we had been originally intending to do an 18th century/pirate theme).

Now, when this whole thing started, there was a little over a month until Halloween. In the interest of time, and saving my sanity, I wasn't too overly concerned with keeping things historically accurate. I know there are some out there to whom it matters a great deal and others to whom it matters not at all. I all somewhere in the middle, leaning towards the side of 'favoring'. In my opinion, if it looks accurate (a.k.a. no exposed mechanically-done seams, fabric that at least looks correct, the right cut and shape, etc.) then I'm good. I just wanted to put that out there in case anybody is totally turned off by the fact that my creations will end up being about 80-90% accurate, so they can stop reading before they get really far in.

So, back to the background. We all picked personas that we would play for the night. My sister chose Caterina Sforza, I chose Lucrezia Borgia, my mother chose Vannozza dei Cattanei, and my brother chose Lorenzo de' Medici. These decisions didn't feature too heavily into the clothing designs, but it's what I'm naming the outfits after. I decided to make all of the outfits from the same time and place, c. 1490 Florence, a particular favorite of mine.

Thought to be Lucrezia in a fresco by Pinturicchio, c. 1494.

Research

The undergarments for this time period were relatively simple. For men and women, the garment worn closest to the skin was called the camicia, which is also known as a chemise or shift. It's a loose garment made mostly of linen that is a lot like the ones worn throughout history, just fuller. Males' were shorter than females', reaching about to mid-thigh. They also had a split up the side and a collar. Women's were longer (about ankle-length) and had wide necks that could be easily slipped over the head.


For women, a dress was called a gamurra. The style varied over the years, but overall the bodices were on the short side (think empire-waist with some extending down to the natural waist), the sleeves were detachable, and they laced up the front (but moved to the side as fashion moved to the next century). They were worn by ladies of every social standing and could be as plain or as fancy as the wearer deemed.


Also for women was the gionrea, an overdress. They were sleeveless and were worn by men and women, with the male version being shorter than the female. I had initially planned to make one for me, but I scrapped that idea soon into the research phase.

One accessory I whipped up was a pocket, or saccoccia, to go along with the Caterina dress. The pockets seemed to date form about the middle of the sixteenth century which was a bit late for us, but it was a necessary item.

A Renaissance Saccoccia by Anéa

A man's outfit from this period was much harder to tackle for me. I'd been researching female's clothing from this time period for years (just out of personal interest) and had it down pat before I even started. By the end of October, I had gathered that a man's doublet was called a farsetto, and he wore either split or joined hose (split had been commonplace until about now when joined hose began gaining popularity). I found a few fantastic resources that really helped me.

Farsetto Construction of the Italian Renaissance by Elizabeth Jones

So up next in this series will be the actual outfits, so you'll finally get to see what I've been talking about this whole time.

Part Zero: Master Post
Part Three: Lucrezia (my outfit)
Part Four: Vannozza (my mom's outfit)
Part Five: Lorenzo (my brother's outfit)
Part Six: Wearing It All (Halloween 2014)

Bonjour & Welcome